


You may have seen, or even own, the very popular LEGO GAME BOY that was released last year. It went down incredibly well with gamers, and likely even more so for the bank of LEGO, seeing as it's sold in incredibly large numbers due to the reasonable price tag.
However, many have been anticipating the retro gaming modding community to work their magic, and although things are under wraps in that space, a new company has beaten them to it, and they're calling it the BrickBoy.
It recently hit $1,000,000 in backing via their Kickstarter page, which is also accepting late pledges and has a planned release date of May/June, which Thomas, the co-founder, confirmed they are on track for.
BrickBoy invited the Retro Dodo team into London to get a first, hands-on look at their BrickBoy Prototype, so we can share with our community what's to come, what's being worked on and how it was made possible.
This prototype is the "final" prototype before being sent to mass production, but a lot will change. The unit you see today is certainly not the one customers will receive. For example, you will see some pieces not fitting together perfectly. The prototype itself is made with 3D printed plastic, and the magnetic buttons are not as accurate as the final customer-ready units.
But, it's 80% there, and the BrickBoy team are more than happy for us to show you this unit, alongside their plans upon release.
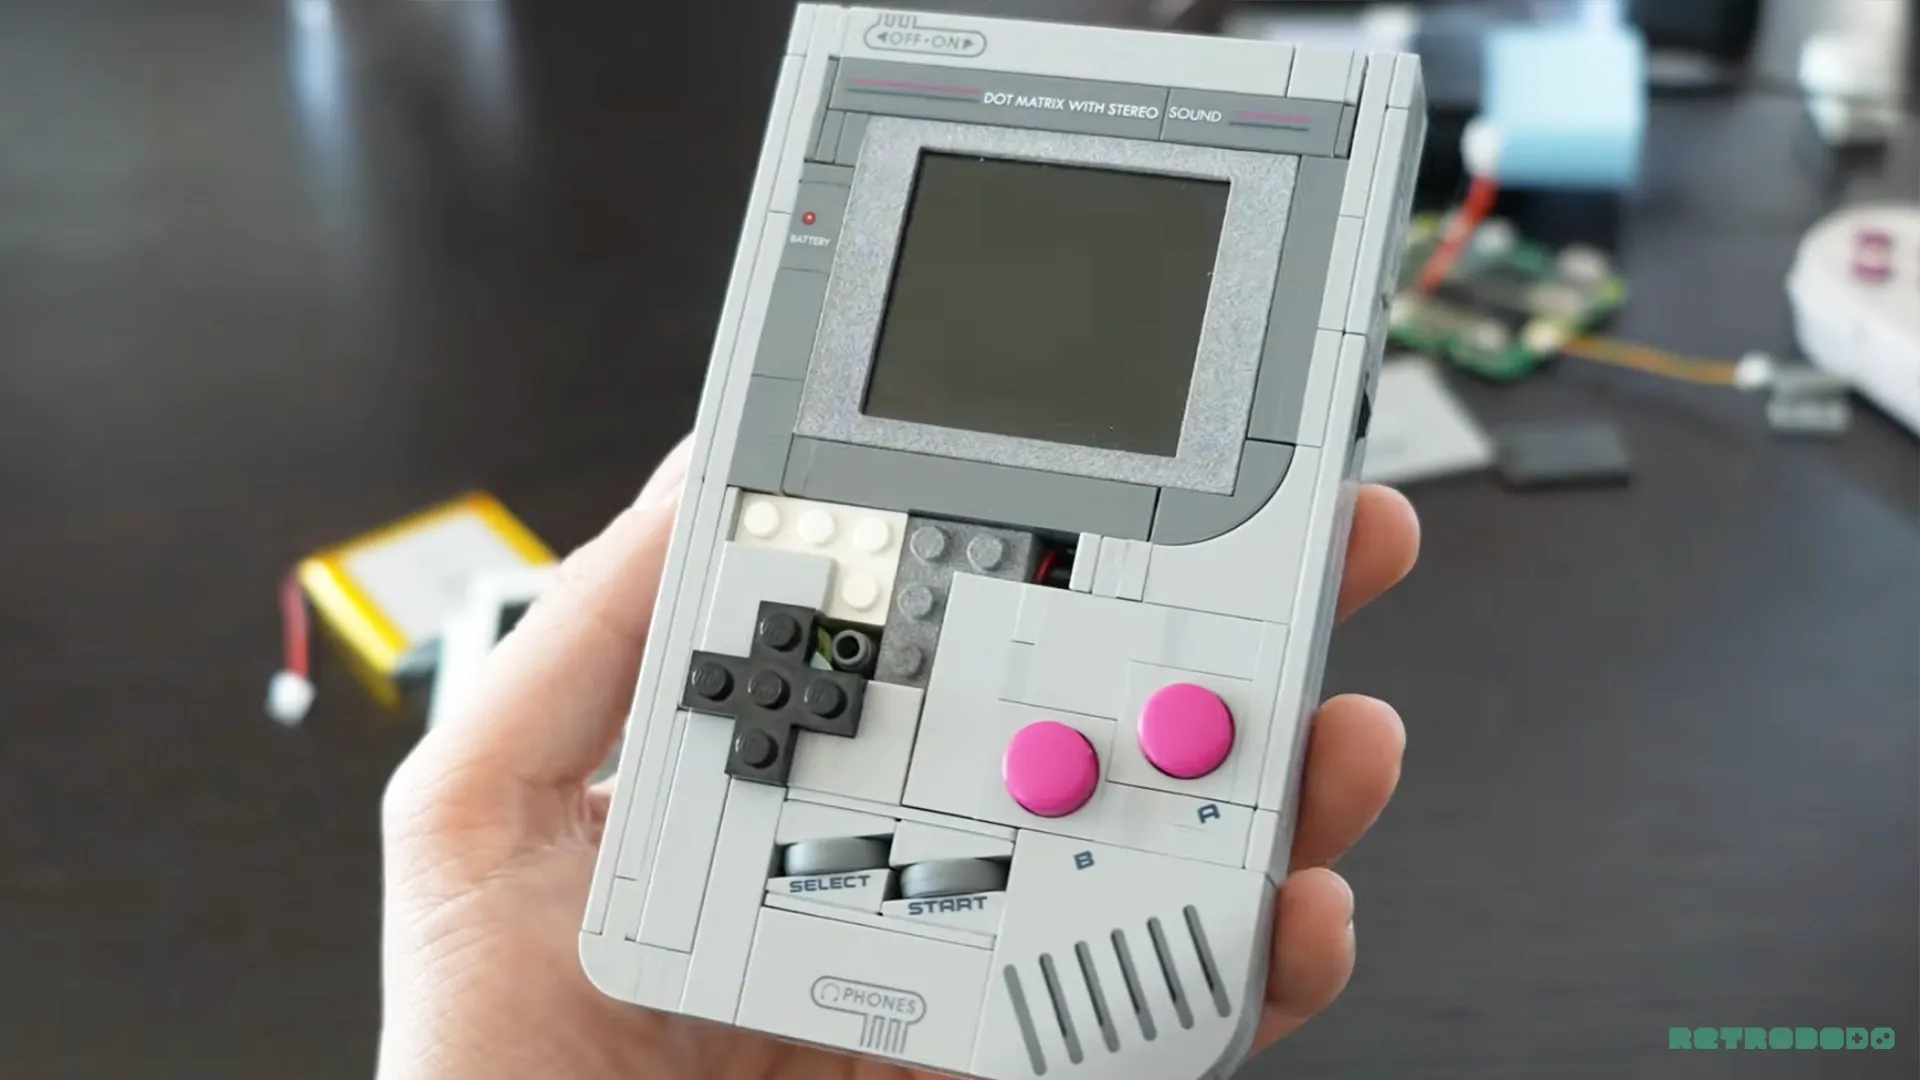
The Console Itself
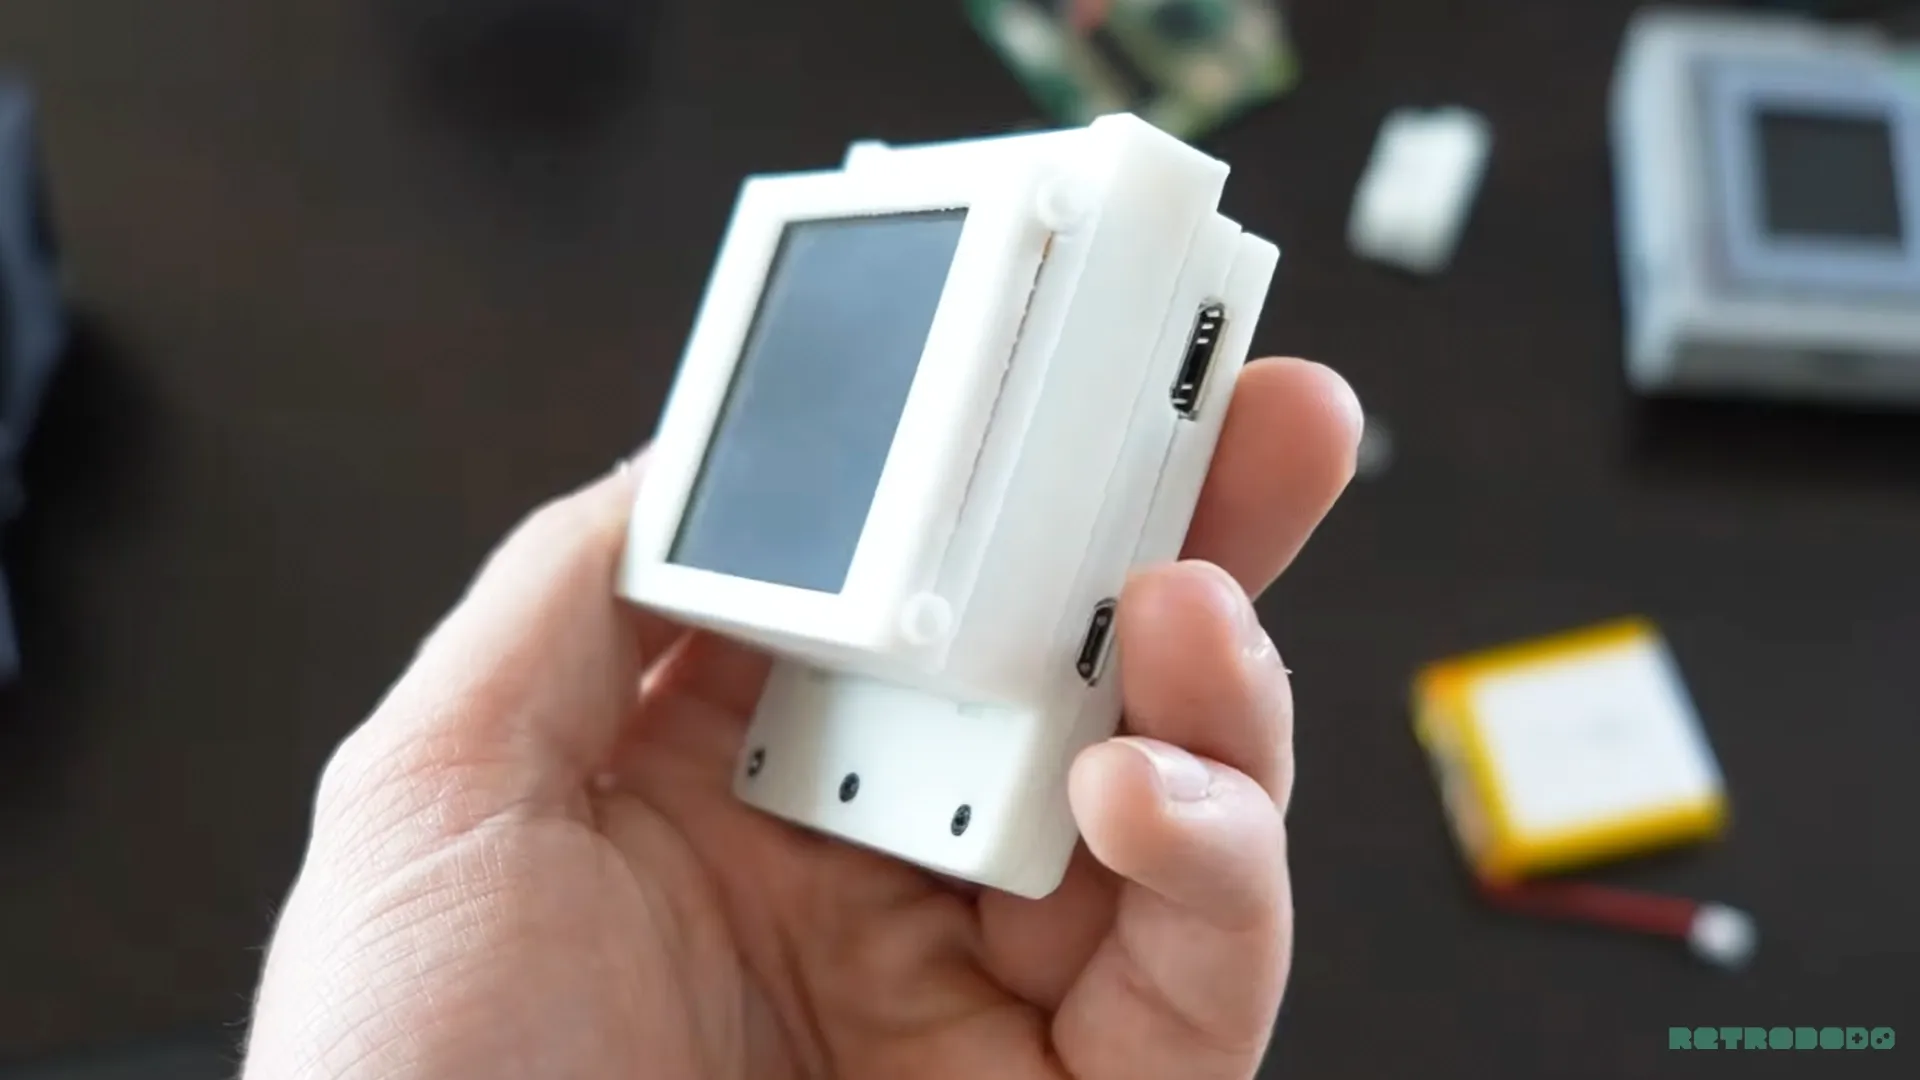
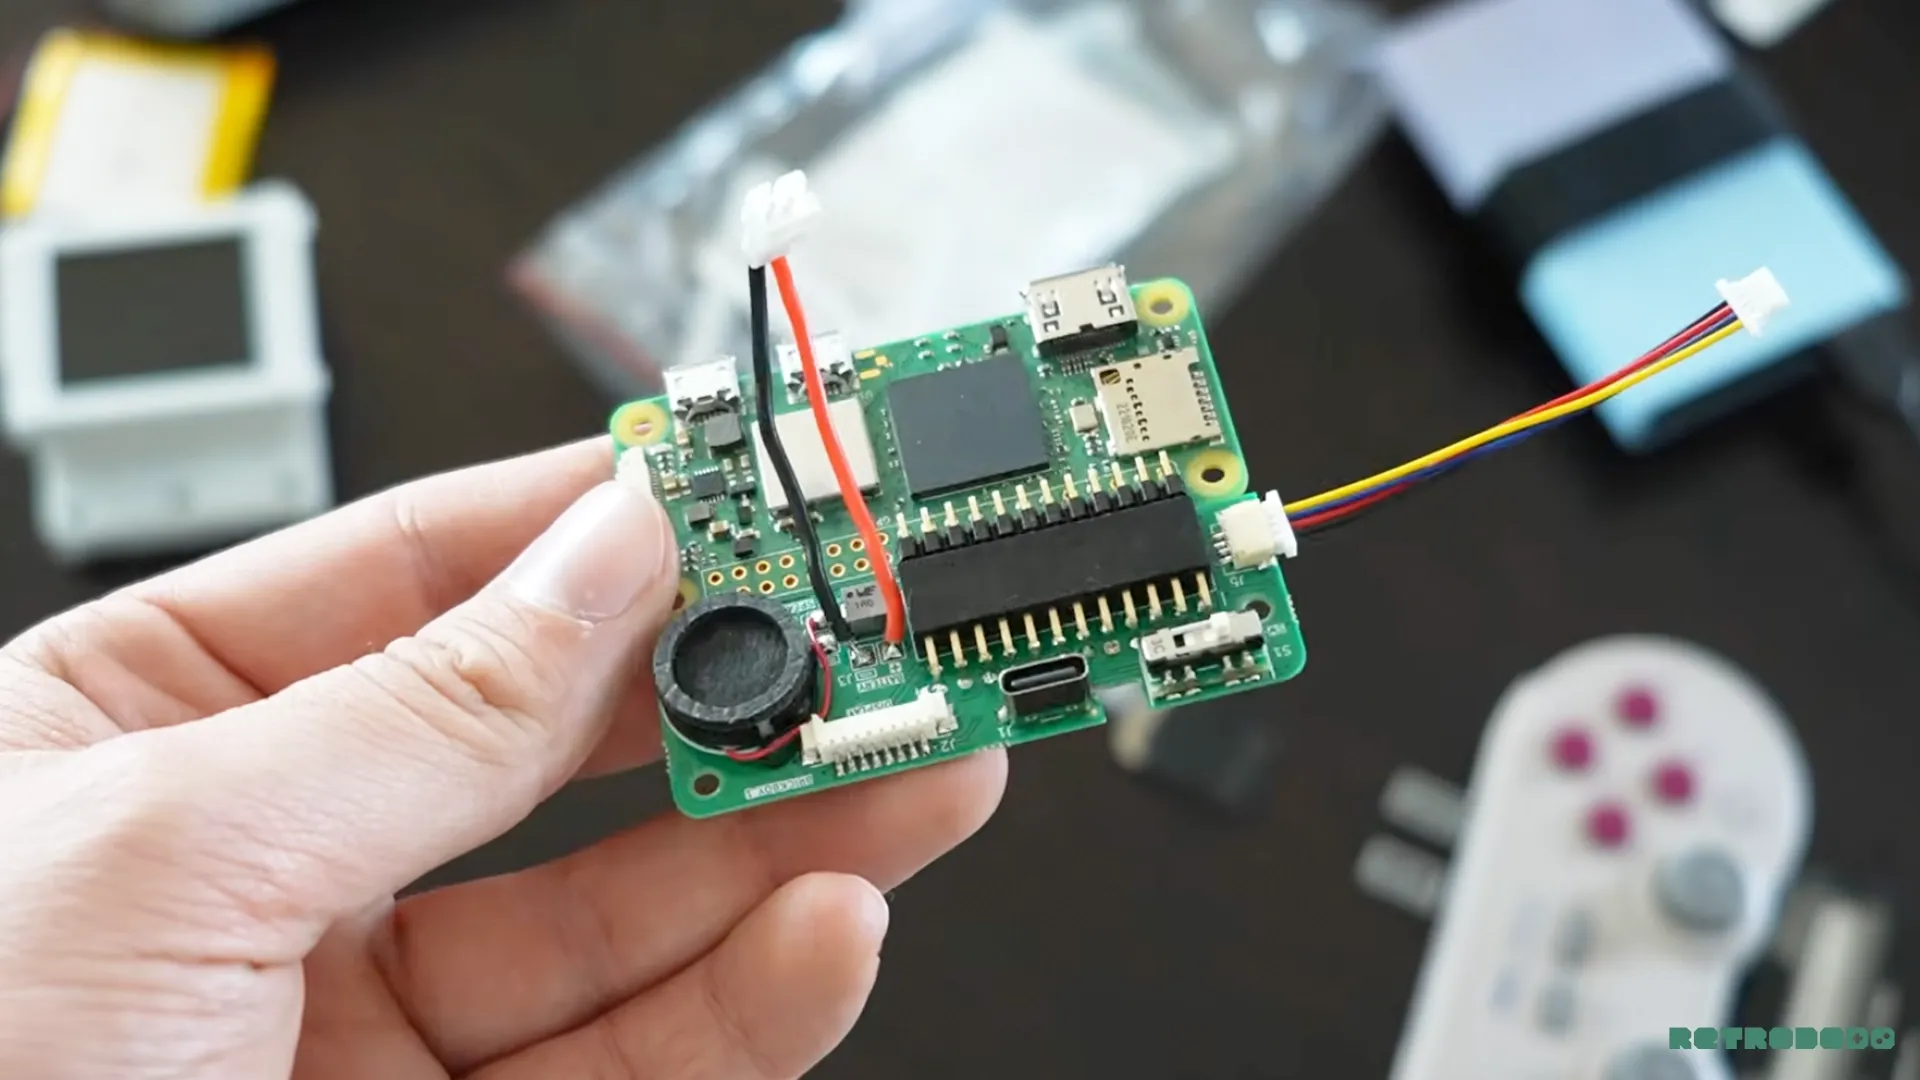
The Raspberry Pi sits inside a custom plastic build that features exterior LEGO pieces that allow you to connect it naturally to the internals, offering official LEGO pieces to connect to it organically and safely.
It houses a 2.4" screen, alongside 3000MAH battery, a speaker, HDMI out, USB-C charging, and a magnetic heart that connects to the buttons of the LEGO GAME BOY. These buttons are authentic, and the BrickBoy team did not want to replace them. It was one of their top priorities to keep the LEGO DPAD, on/off, start/select and action buttons.
But that comes with a lot of technical challenges for the team. In order to pull that off, they had to insert magnets into the buttons, so that the magnetic heart was reading the prices via magnetic waves, instead of wires...
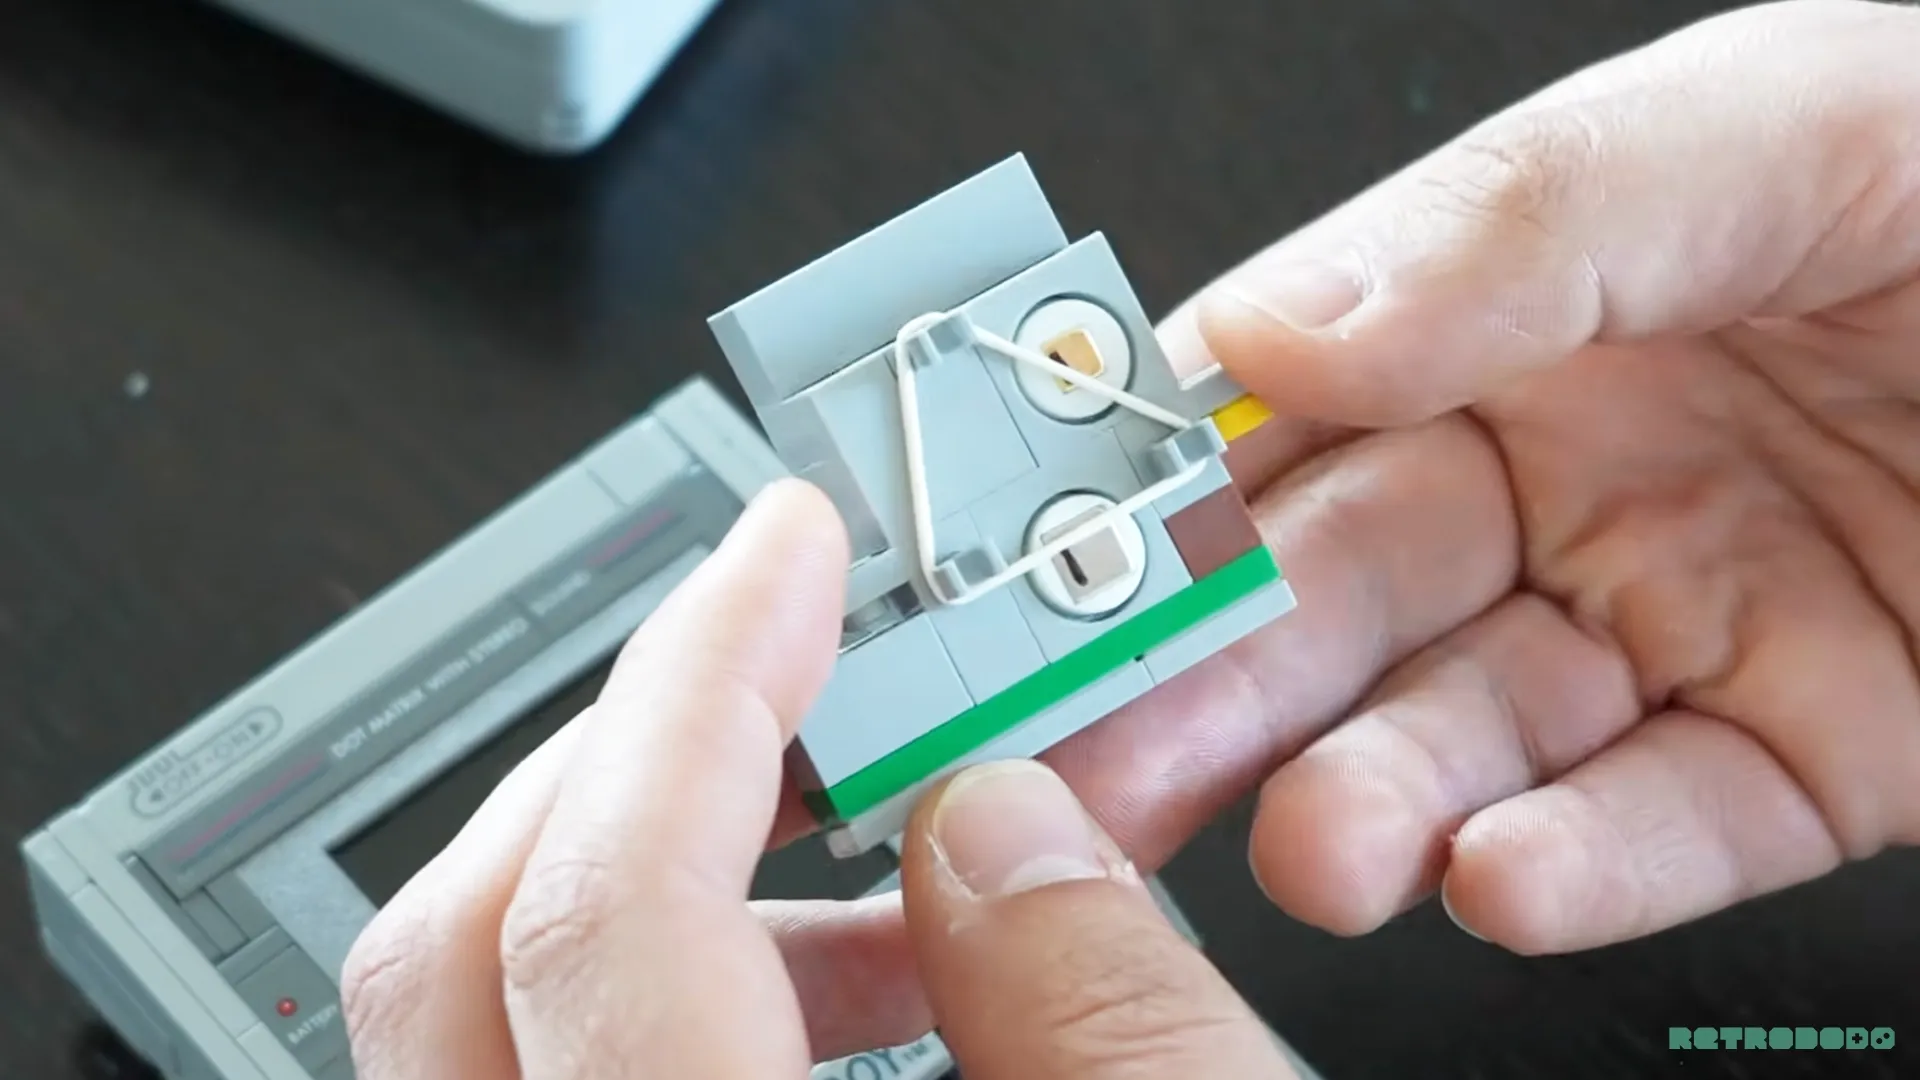
The PCB doesn’t connect to the buttons using wires; instead, it reads pressure via magnets that have been placed under the buttons and the on/off switch. Which is crazy when you think of it, this is because of the restrictions of the actual LEGO set, alongside the team wanting to use the actual LEGO pieces as buttons authentically.
So small presses of the buttons literally send a magnetic wave to the PCB that reads inputs. I’ll admit at times on this prototype it would not register, or the opposite, registers it as being pressed for eternity, which the team assured me would be fixed at launch, but when it worked, it worked well with very little latency at all, which really did surprise me, as it's one of the first controller inputs I’ve tested that uses… magnets?
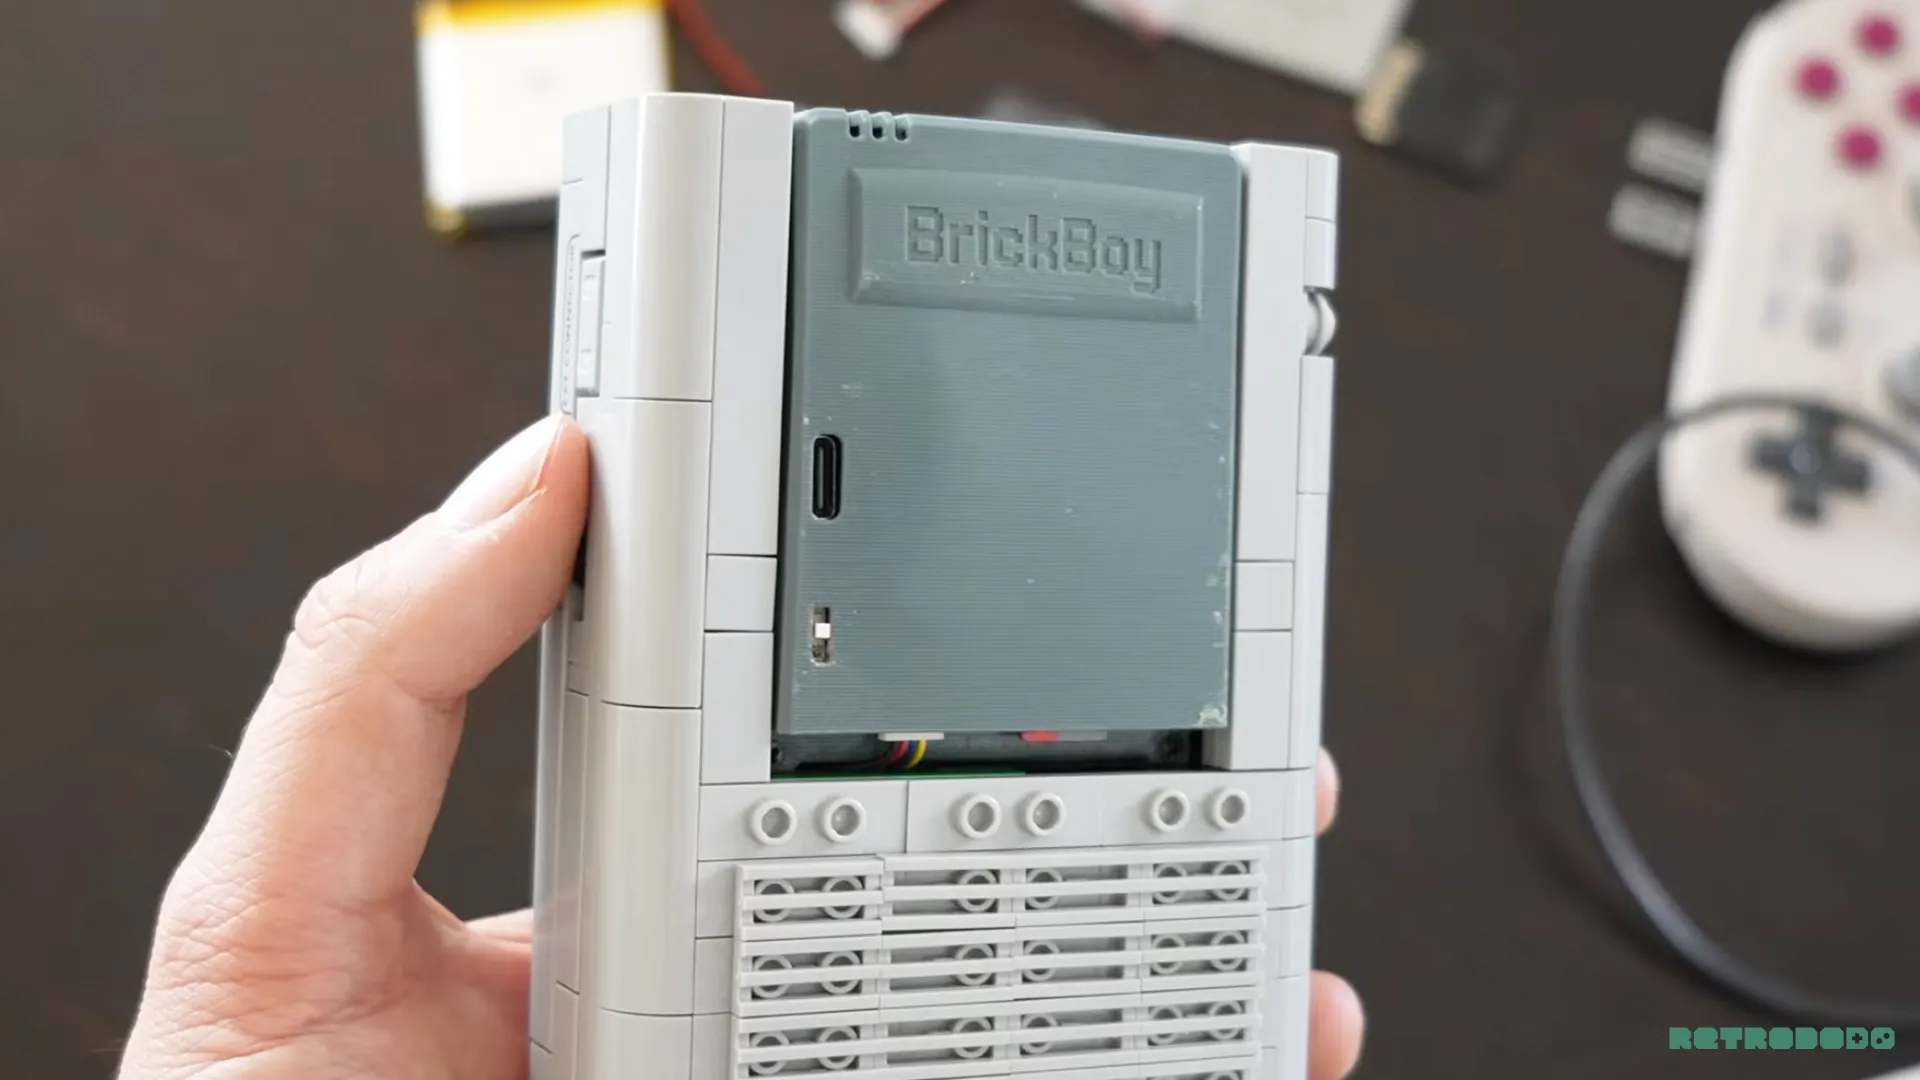
The back of the BrickBoy will look like a cartridge and can be partially hidden by using the LEGO GAME BOY Backplate that features the unit code, also hiding the on/off/reset/menu switch and the USB-C port, hiding it naturally and safely.
This unit is so precisely made that the on/off/reset switch has to sit inside one of the circles in the back of the LEGO piece in order for it to fit. This button can also put the console into different modes, such as a reframe mode that resets the magnet calibration. The weight of the Brick Boy is similar to the weight of the set itself, doubling the weight in total to closer to 1000g, which will somewhat surprise you when you pick it up. But it's not "heavy" at all, just noticeable.
Software Shenanigans

Internally, the Raspberry Pi is installed with RetroArch in order to emulate your games on the go. If you are familiar with RetroArch, it's a very effective launcher that houses "cores" or emulators for specific games, so you will need to set up your "ROMs" via RetroArch. This may be cumbersome for newcomvers but the BrickBoy will come with a manual to hold your hand through this process alongside a custom-made front-end for the BrickBoy itself to make tweaking settings a little easier.
Shortcuts such as holding A+B+Left will open menus to access RetroArch and BrickBoy settings. This shortcut didn't get in the way at all, and I don't think it will for average gamers, but it would for those who like to button bash in fast-paced games.
You could technically push the Raspberry Pi Zero to its limits and install PS1 cores, for example, but there's very little ventilation in here, especially when you consider this is a console, being contained under LEGO bricks, so although BrickBoy never mentioned it upon my visit, it could overheat should you put too much stress on the CPU, in my opinion. There is a heatsink installed, but no fans.
The audio is very good quality upon testing. Thomas, wants the audio to be a little bit louder and is working on doing so too, but I would have to disagree here, I thought the audio was fine, and believe that many users who play on here won't want this to be a loud console, if anything, many of us will be using this in mute mode or under 50% volume most of the time.
Due to it being a Raspberry Pi, the volume cannot be changed via the buttons or the exterior of the console like the buttons can; instead, you will need to do this within RetroArch. It's a small restriction, and one that I don't mind doing personally, and I can imagine getting the volume wheel to work on here physically would have been a technical nightmare.
With it being a Raspberry Pi, there are extra features such as Bluetooth connectivity for controllers, wireless updates, streaming to tvs and more that give it an advantage over a modified GAME BOY Pocket PCB, for example, should users want to tinker and dive into that kinda stuff. So you could technically connect this to a TV and a wireless controller to use it as a literal home console.
How Long Does The Mod Take?
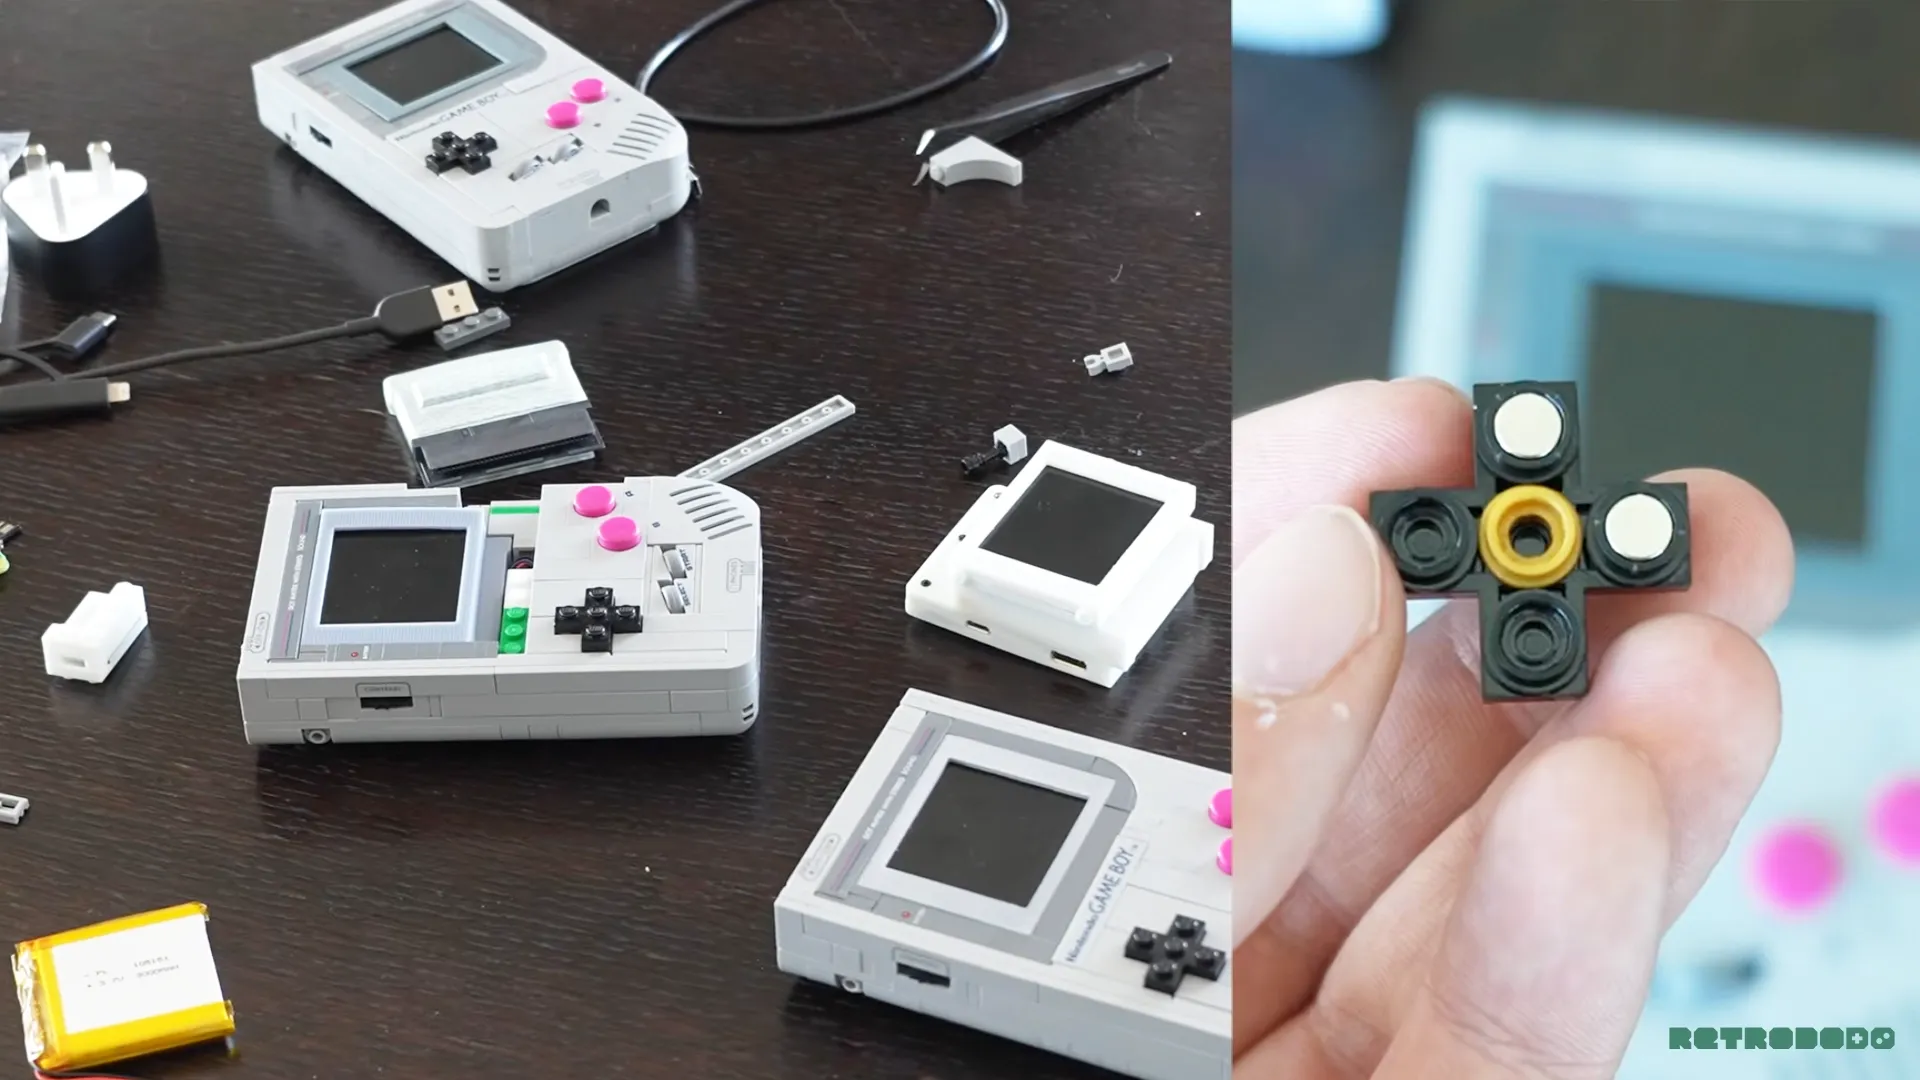
I did not get to build the set entirely, but I did watch the team take it partially apart. Apparently, the set itself takes just 15 minutes to build, as a majority of the build is one large single piece that houses the complete Raspberry Pi.
It's likely the instructions manual will ask you to remove a handful of pieces from the set, alongside adding some of BrickBoy's pieces to help contain the console in its original location, such as the Magnet Sensor, directly in the middle of the console, in order to receive the strongest signals from button presses.
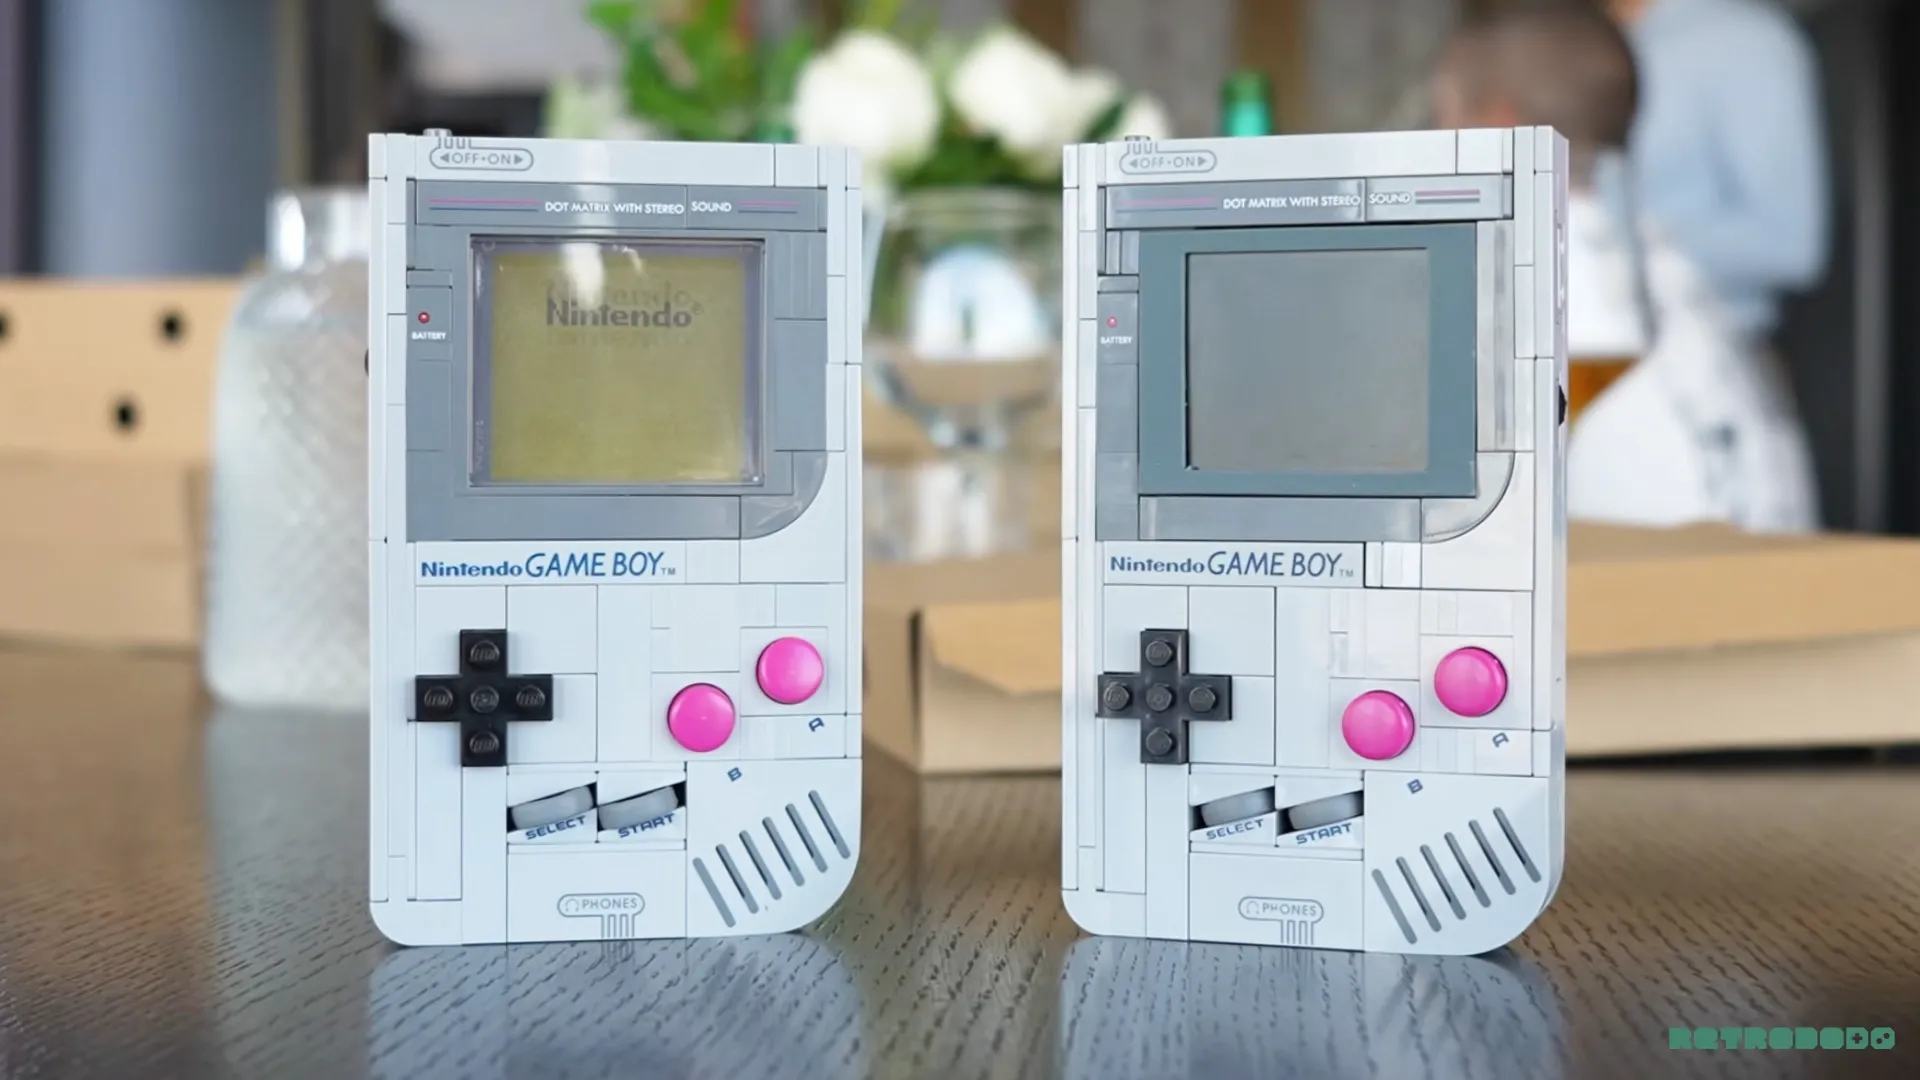
You can also see from the image above that the display replaces a few pieces around the transparent display piece on the original set, so there is a compromise here, alongside the addition of the grey display border, which will match the official piece's colours better, upon release.
Overall Opinion
During my very limited playtime, it’s clear that this is going to be a short and fun modification for LEGO and GAME BOY fans, that will fit seamlessly with the set while keeping its iconic buttons and build strategies. It's a set and modification for enthusiasts familiar with RetroArch and Raspberry Pi, however.
The prototype was a little messy, I’ll admit, and more so, the magnet accuracy sometimes did not process my inputs at all, which then forced the magnets to be recalibrated using a software input. I am hoping customers and backers don’t see this at all because it seems like an easy malfunction; if the magnets aren’t being read, the whole modification becomes useless.

As said, the team has reassured me this won’t be the case in the final units, and I believe them. It’s remarkable how they’ve managed to cram an entire Raspberry Pi in here seamlessly, while removing very minimal pieces, and the reason you’d want this over a legitimate GAME BOY internals comes down to the benefits of a Raspberry Pi, such as Bluetooth connectivity, wireless updates, streaming to tvs and so on.
It's an exciting project, I look forward to seeing it in the wild, and I'm also excited to see what else they work on in the future, as I can imagine this isn't going to be the first jab at turning a LEGO set into a fun technological project. Thomas mentioned that we'll likely see "new" announcements from them later in the summer.
You can late pledge on Kickstarter here, should you want to be one of the first to experience the BrickBoy in a couple of months.


