


If you've been into video games for as long as me, then it's highly likely that you've acquired quite a few consoles in your time. And while newer systems from the seventh generation onwards are mostly plug and play thanks to the standardisation of HDMI video output and HD/4K displays, where does that leave the older consoles that rely on video outputs which are no longer as universally supported?
Well, that's where you're probably going to want to invest in an upscaler of some sort. These things take older video signals and convert them into a clean HDMI output, with the aim of scaling everything properly.
This is the newest model of the RetroTINK range called the RetroTINK-4K CE. The 'CE' stands for 'Consumer Edition', which refers to its more reasonable price compared to the more premium RetroTink-4K Pro. Still, is it worth investing in over its more expensive pro variant? Let's take a look!
An expensive device aimed at retro gaming enthusiasts but this slightly awkward middle ground means there are probably better options out there for your upscaling needs (both cheaper and more expensive).
- Price: $475.00 + shipping & taxes
- Available From: RetroTINK
Putting A Price On Upscaling
Before we dive into the video quality comparisons, let's first talk about the price and our first impressions of the RetroTINK-4K CE.
The RetroTINK website has it for sale at $475.00, which converts to £357.65. However, this figure could potentially be quite misleading, because if you include shipping to the UK, the price is bumped up to $554.00, or £417.14.
I was actually charged £428.76, but I did buy it back in March, so maybe the price has just slightly changed since then. Another hidden cost to watch out for is the sneaky import tax, which cost me £86.48 and brought the overall total cost of the RetroTINK-4K CE up to a pretty astronomical £515.24. Bear in mind that the import tax and shipping costs will vary depending on where you're located, but either way, you're looking at a pretty hefty investment, especially when you take all of the additional fees into consideration.
Built To Blend In
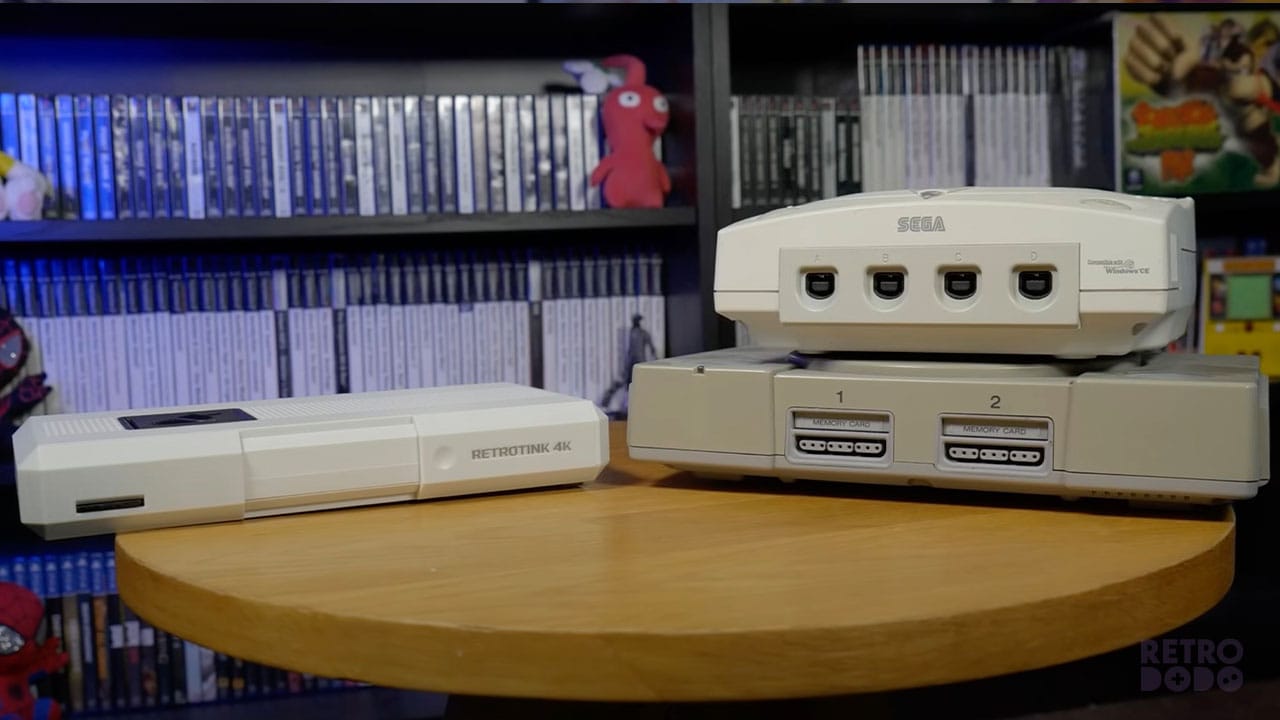
The unit itself is very well built and reflects the premium price tag. The 4K CE has this slightly off white shell, which sort of matches the colour scheme of the Dreamcast and PS1, while simultaneously looking quite modern and fitting in well with other newer consoles like the PS5 or the Wii. This parity with a few different consoles will make it blend in perfectly on your TV unit, no matter what systems you're using.
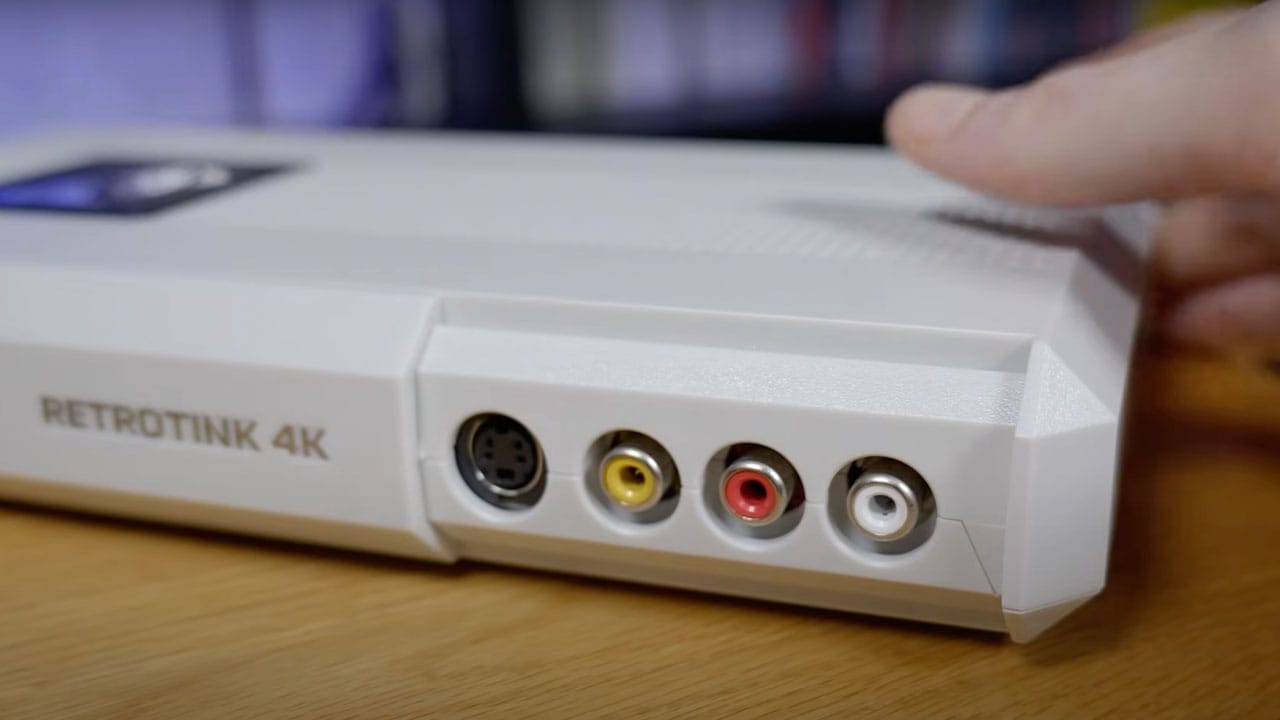
On the front of the 4K CE, we've got an SD card port, which is where the RetroTINK firmware and profiles are stored. We've also got a sliding door which hides the lower quality video inputs such as composite and S-video, so if you aren't utilising those, you can just slide the door shut and keep the front of the device looking quite sleek.
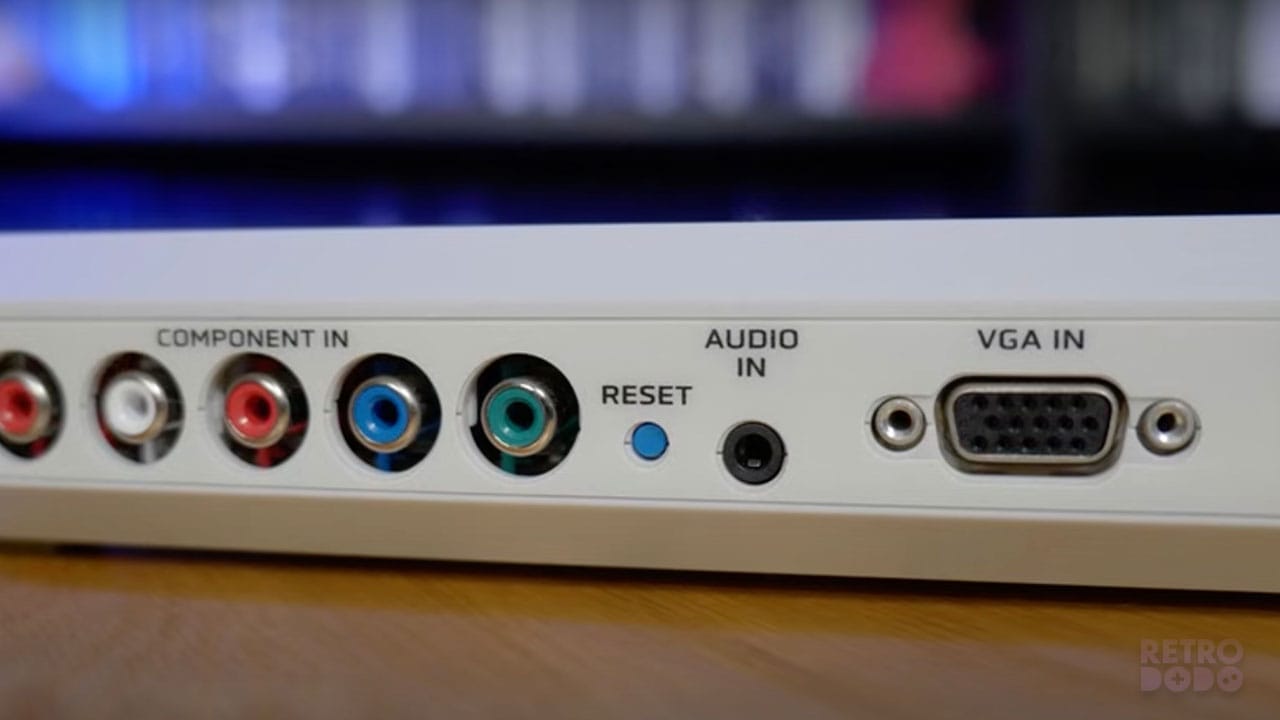
On the side of the device we have a Scart input and at the back we have basically every single other video input option you could ever need, component, VGA, and HDMI are all accounted for along with an 3.5mm audio jack input and optical audio input for any advanced sound setups you might have. The only other details here are the reset button, which as you would expect, will restart the device if it were ever to crash or stop functioning correctly, and the USB-C input which is used to power the device. It also comes with a USB-C to USB-A cable so you won't need to supply your own, although it doesn't have an AC adapter, so you might need to source your own one of those if you're providing power from a wall outlet.
The other thing the device comes with is a pretty big remote which can look a little bit daunting with its 51 buttons all staring you in the face. However, you'll probably only need to use a few of these to navigate menus, with the other stuff being there for more advanced users.
And this is where I should probably state that I am in no way an advanced user. I'm just a guy with a lot of consoles who wants to get the best picture quality possible without having to take out a loan to afford an even more expensive upscaler. So with that, bear in mind that it might be possible to tinker with some advanced stuff to get slightly better image quality from certain systems or specific game, but I think I've done a decent enough job at setting this up to showcase what it's capable of in a more sort of plug and play scenario.
Keeping A Low Profile
With that being said, I did want to update the RetroTINK to its latest firmware and update some of the profiles I knew I was going to be using. Luckily, this is super simple, and you pretty much just drag and drop update files from the RetroTINK website across to the supplied SD card and then pop it back into the device, go into the update menu in the settings and it'll just update itself. It's not as simple as just doing it automatically via the internet, which admittedly would have been an awesome feature, but this method of plugging it into a PC is probably the next best thing.
Profiles are basically settings presets that have been created by people who have deep knowledge of the video outputs of particular consoles and have used the RetroTink-4K CE to get what they consider to be the best picture quality that can be achieved with the device. So, rather than you having to mess around with the myriad of settings yourself, you can just use someone else's settings who can probably customise everything better than someone with no real experience with this sort of thing.
One of the leading authorities on this subject is Wobbling Pixels, whose profiles are actually on the RetroTINK-4K CE out of the box. However, they've recently released updated versions of these profiles after tinkering with the settings some more and taking on board user feedback. I wanted to use these updated versions to ensure I was using the device to its full potential. To do this, you plug the SD card into a PC, delete all of the old Wobbling Pixels profiles, and then just transfer the new ones over.
Putting The RetroTINK-4K CE Into Action
And with that, let's show some footage from a few systems and demonstrate the quality jump you might be experiencing by using the RetroTINK-4K CE. I'll go through the exact setups for each system as we go through them, but the main thing you need to know right now is that I'm capturing the footage with an AVerMedia GC573 Live Gamer 4K capture card and I'm using Wobbling Pixels profiles for most of the retro systems we're looking at.
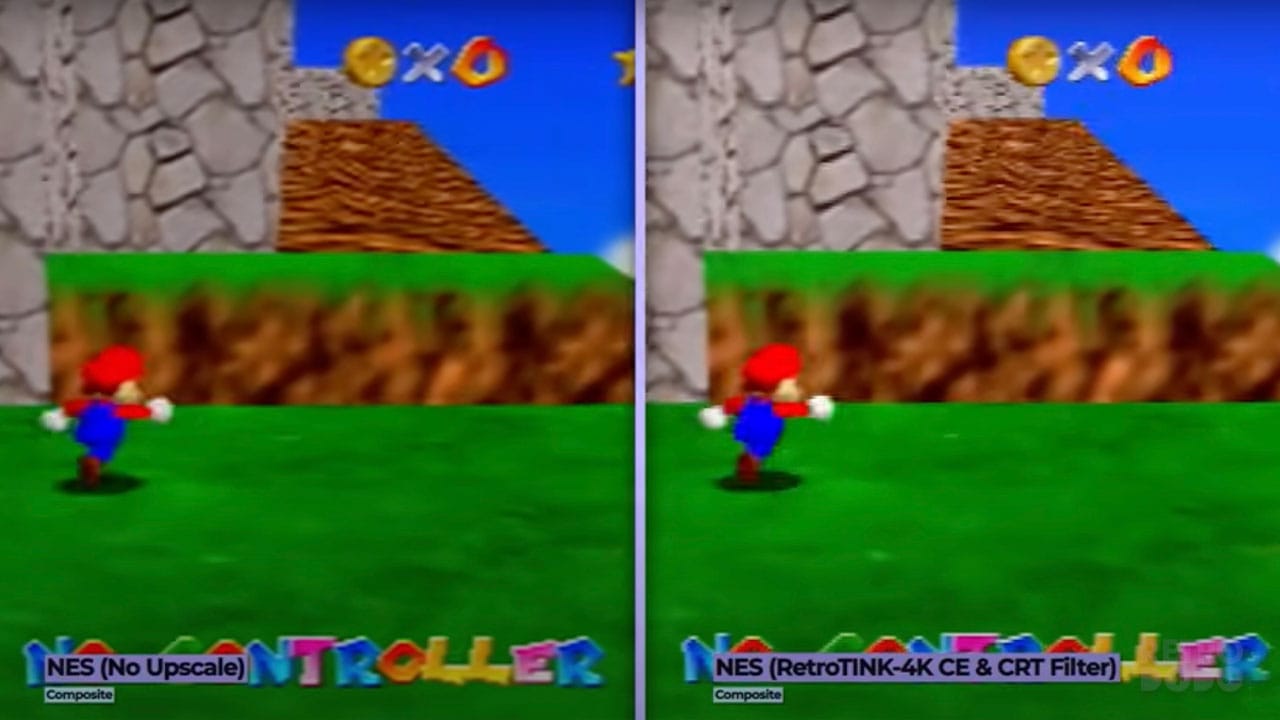
NES
So, starting with Nintendo systems, let's look at the NES. For my 'before' footage, I'm using composite cables and passing it through the RetroTINK 2X with no upscaling or filters applied, effectively giving us an unaltered video output, just converting the composite signal to HDMI to allow me to capture the footage.
I've got to be honest, considering this is a composite output, this isn't actually too bad. Still, it is obviously quite blurry. Moving over to the upscaled 4K CE footage, I decided to enable a CRT filter, and this definitely helps to make the image appear sharper even without changing from composite to a higher quality cable. You can customise the type and strength of the CRT filters, but I always like to go for a fairly subtle one because I feel like the more intense it becomes, the more it starts to become a little bit distracting.
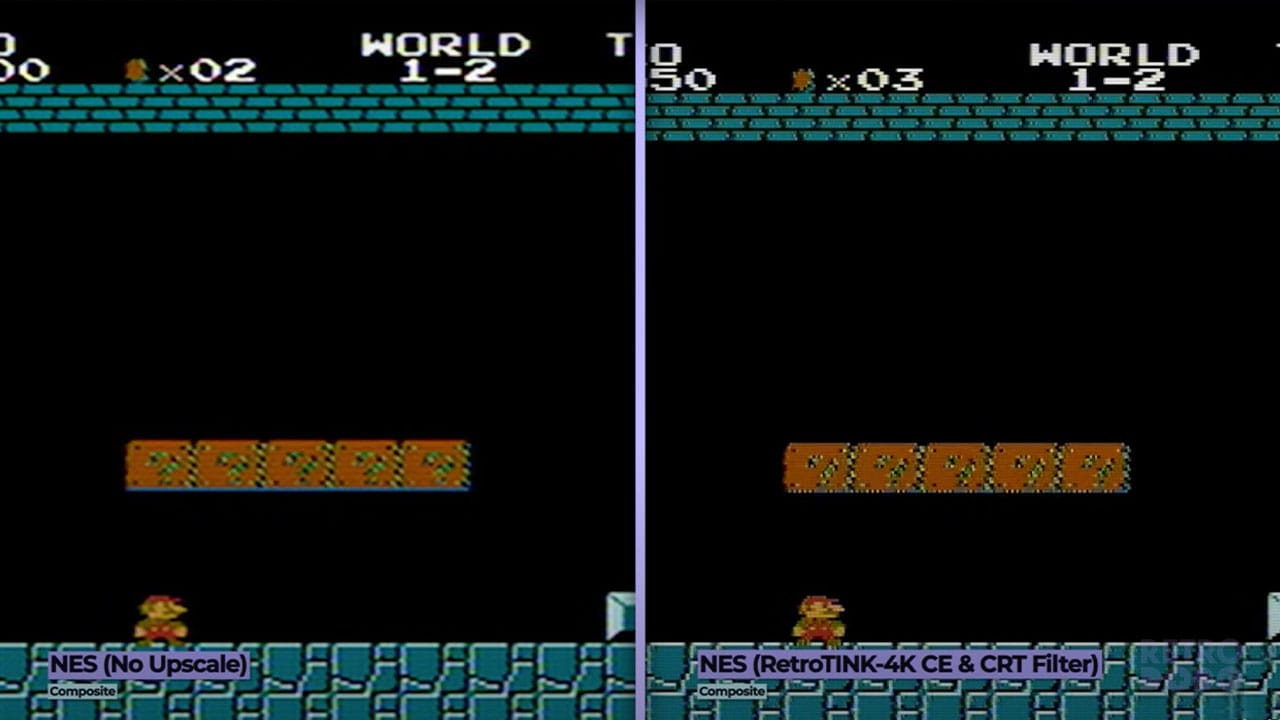
Removing the CRT effect gives us an image that is still sharper than the standard composite video but just doesn't look all that impressive. The reason for this is that composite video cables just aren't that great; there's only so much that an upscaler can do when the image it's working with is this low quality. In order to improve the video from actual NES hardware, you'd really want to invest in a hardware mod like NESRGB to give it a better video output option.
N64
Moving on, we've got the N64, which again is using composite video output. However this time, because of the slightly higher resolution compared to the NES, we can see a bit more of a drastic difference in quality when run through the RetroTINK-4K CE. It's not mind-blowing, but everything looks noticeably sharper and more in focus.
You could improve the video quality seen here by quite a significant amount by simply swapping from composite cables to S-video ones, but I don't actually own S-video cables for the N64, so for now I'm stuck with good ol' composite.
GameCube
The GameCube is one of the main systems I was looking forward to testing out here because I previously only had composite cables for this console too. I got a Scart cable months ago, knowing that I was going to be upgrading my setup at some point. Because I was stuck with the RetroTINK 2X, which doesn't have a Scart input, I couldn't actually utilise the better video output until now. So, this is what the standard composite video output looks like, and here is the Scart output combined with the RetroTINK-4K CE.
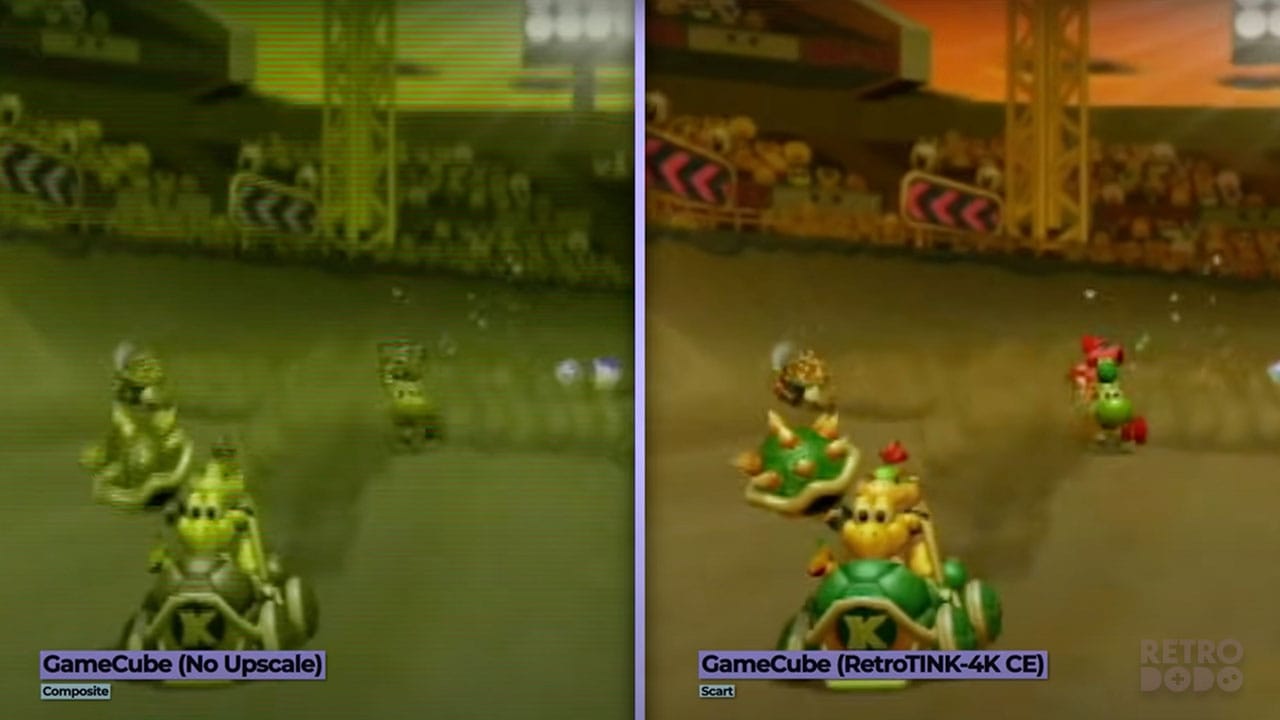
I hope that this drastic difference in quality is coming across even after the footage has been compressed by YouTube, because it's quite a major jump in clarity here. You might say that the bulk of the jump in quality is down to the change from composite to Scart as opposed to the upscaler itself, but the upscaler is what's allowing me to use Scart in the first place so I still think it's a fair comparison and I would imagine that most people looking at getting an upscaler like this are people that don't already have a Scart compatible upscaler.
You might also be wondering why I'm not opting for component cables over Scart, and the simple reason for that is that Scart cables are much more accessible and cheaper for the GameCube and provide almost identical image quality for most games, so it just makes sense to use Scart for this system.
Wii
Having said that, for the Wii, I actually found that component cables were noticeably better quality than Scart. The reason for this is that the Wii outputs in a 480p resolution when using component, whereas Scart is limited to 480i or 240p. The GameCube is also capable of 480p video output in NTSC regions, but I'm from Europe, so that doesn't really apply to me and makes Scart so appealing. Plus, I have seen that people seem to think that the difference between Scart and component on GameCube is minimal anyway, even on NTSC systems, so I don't think I'm missing out on much there.
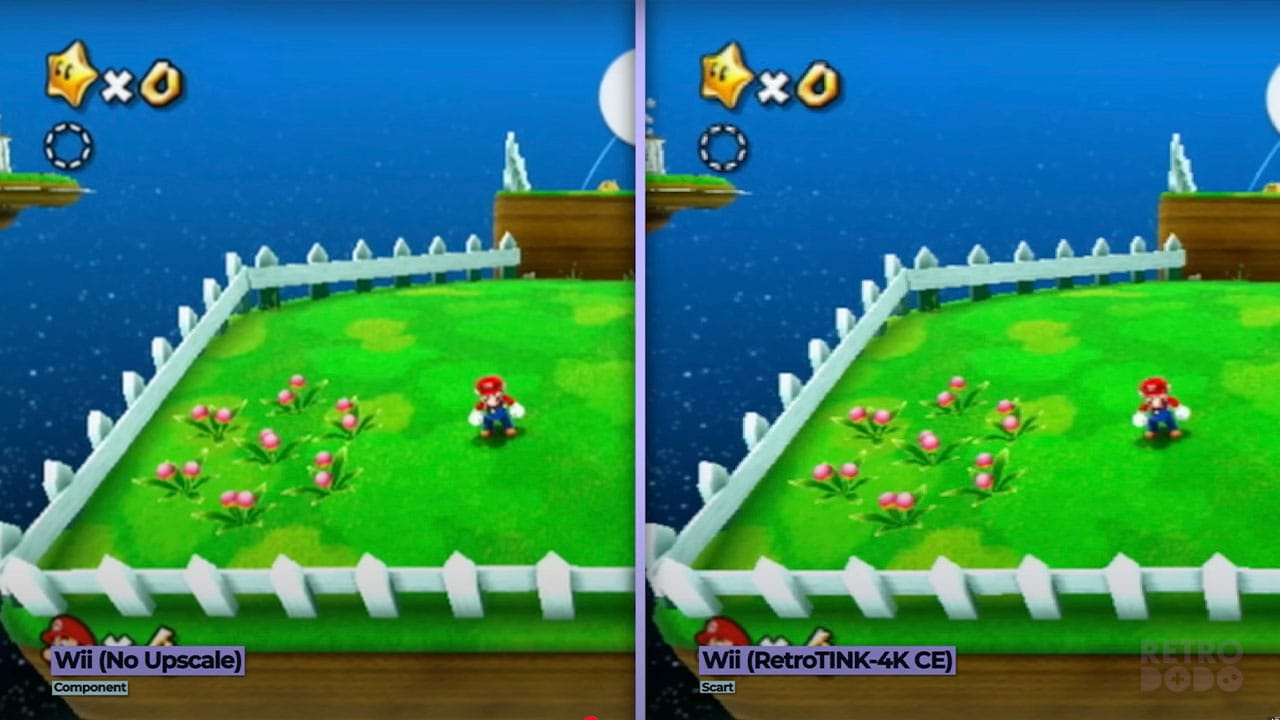
With the Wii, however, just take a look at this comparison between a raw component output and a Scart output with the RetroTINK-4K CE. At best, they look pretty much the same, and it could probably even be argued that the raw component output here looks marginally better. Compare the raw component output with the component RetroTINK-4K CE upscale, though, and you'll see that the image is definitely a bit sharper and clearer. Admittedly, though, the difference is very small here, but it is still great that the RetroTINK is cleaning things up a bit.
Nintendo Switch
Because the RetroTINK-4K CE is a 4K upscaler, it did get me a little bit intrigued as to what it could do with a 1080p console, so I booted up the Switch. The difference here was... well... is there even a difference here?
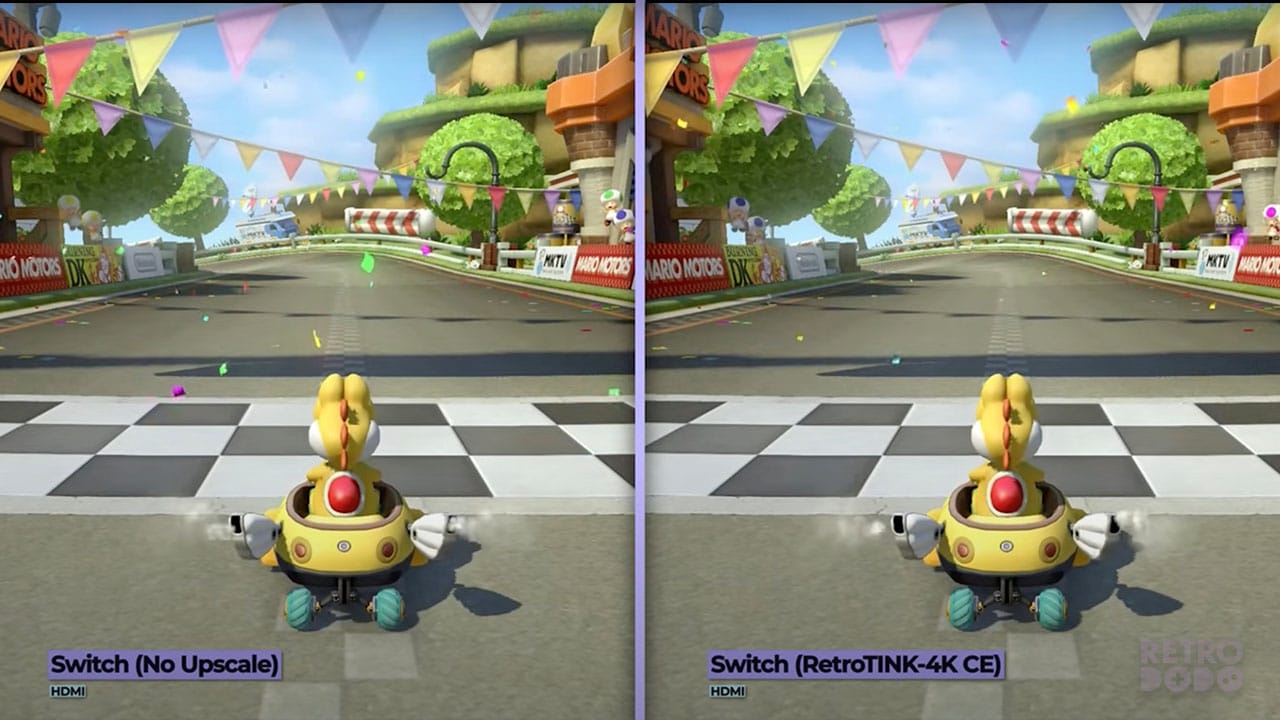
I feel like I can trick my eyes into seeing some sort of difference in colour, but the closer I look, the more I think that the 4K CE is literally doing nothing to the image. So, if you're expecting this to improve any consoles already outputting video through HDMI, I don't think this device or indeed any other device available in 2025 is really going to do that.
Sega Dreamcast Upscaling - Living The Dream, Or A Complete Nightmare?
Let's swap console manufacturers now, though and talk about the Sega Dreamcast! For this console, I've actually already been using the Kaico HDMI Adapter. While this device is amazing, the one major flaw is that this particular model of the device doesn't support any games that are incompatible with VGA video output. So while the majority of the Dreamcast library will work with it, certain games like Resident Evil: Code Veronica simply become unplayable and bring up an error message. So, in order to get full compatibility, I'm opting to use Scart, which is the second-highest quality video output supplied by the Dreamcast that also works with every game.

Comparing the Scart upscale with the Kaico HDMI Adapter, which is effectively a raw VGA video output, is actually quite interesting. Quite clearly, the Kaico HDMI Adapter is supplying a much cleaner image, which is pretty incredible considering its low price tag. But, by using Scart through the RetroTINK-4K CE, we can play Resident Evil: Code Veronica, so which is truly the better option here?
Well, it turns out that the Kaico adapter still holds up against the RetroTINK here because there's actually a new version of the Dreamcast adapter which can swap to a Scart mode, giving it 100% compatibility across the entire library. I would be interested to see what this adapter looks like in its Scart mode compared to an actual Scart cable with the RetroTINK-4K CE. But for now, I think I'm sticking with my Scart and RetroTINK setup purely to make things consistent across my retro consoles and to provide full compatibility.
How Does It Work With Sony Games?
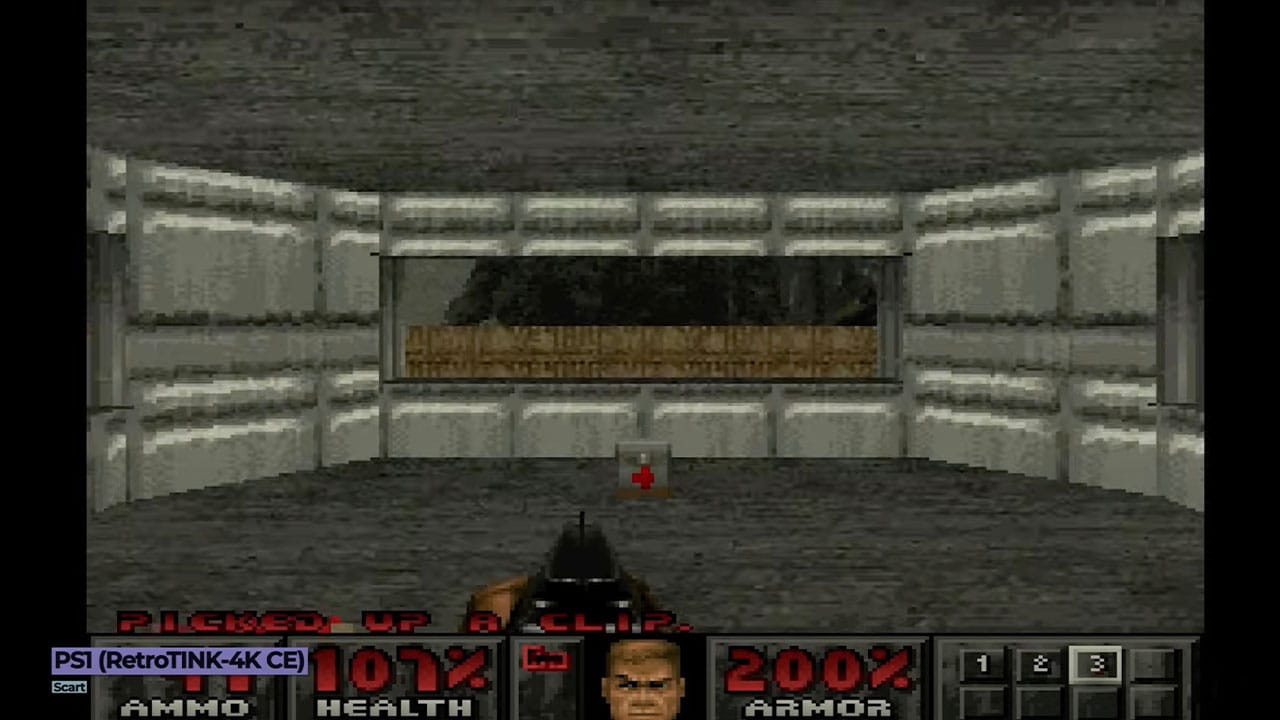
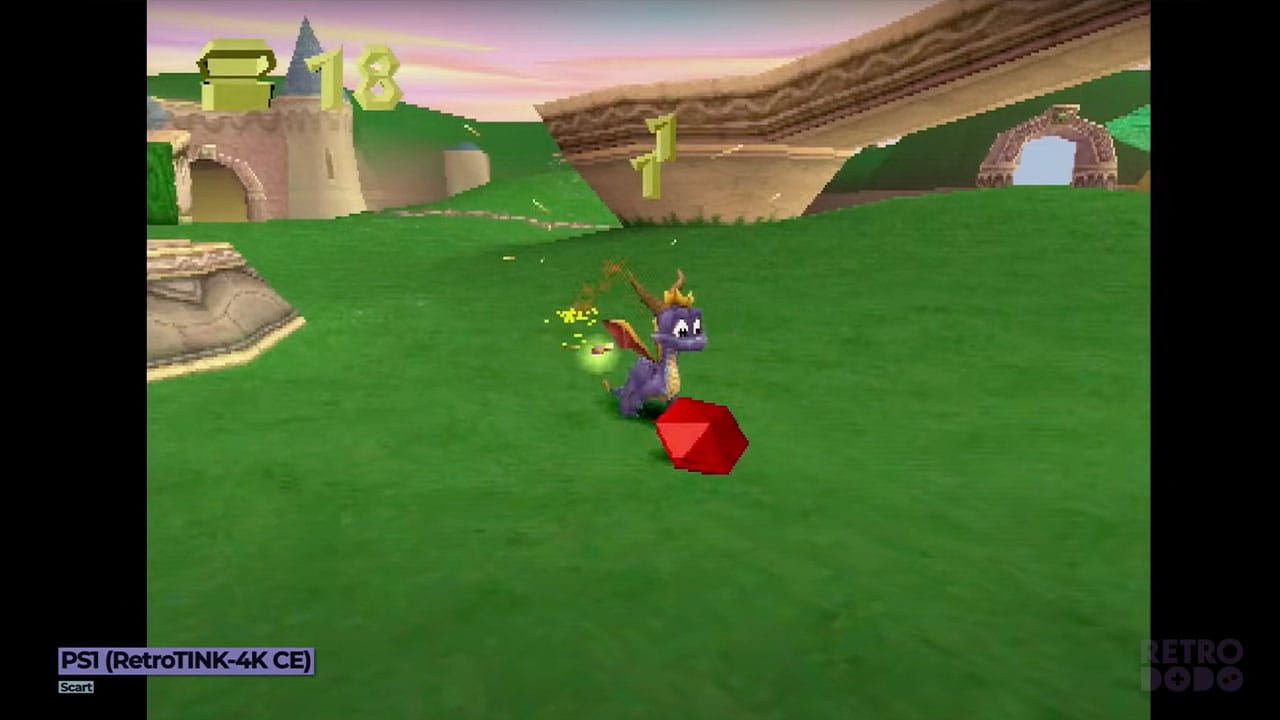
Moving on to PS1 games, though, I tend to play these through the PS2, and luckily, Wobbling Pixels has supplied profiles for this exact situation. This means that PS1 content is going to be scaled perfectly, even if you're playing on a PS2. This is an area where I became most impressed with the quality jump supplied by the RetroTINK.
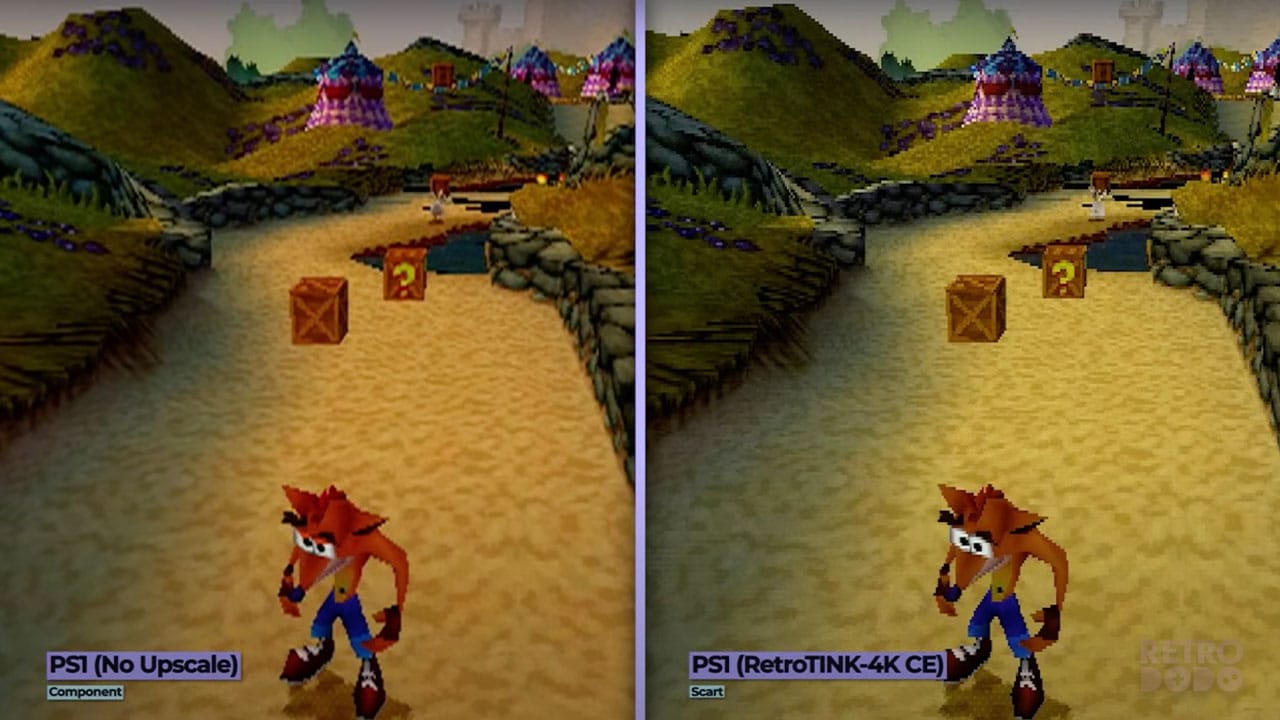
So here's an image supplied by component cables. It looks pretty good actually and I could easily play through games with it looking like this. But then let's look at the RetroTINK image and just take in this difference! It's so much sharper here; it's actually quite crazy. Once again, we have switched to Scart to make my setup as unified as possible, but look how much crisper this footage is!
PS1 is definitely an area where the RetroTINK-4K CE excels, and I'm super happy with that, considering it's the console I get the most use out of.
PS2
PS2, on the other hand, is actually a bit of a weird one. Looking at the component footage here, it looks okay. It's a bit blurry, but it's serviceable. The Scart RetroTINK footage though doesn't really look all that much better. It is slightly more vibrant and sharp but unless you're looking at them side by side like this there's hardly any difference.
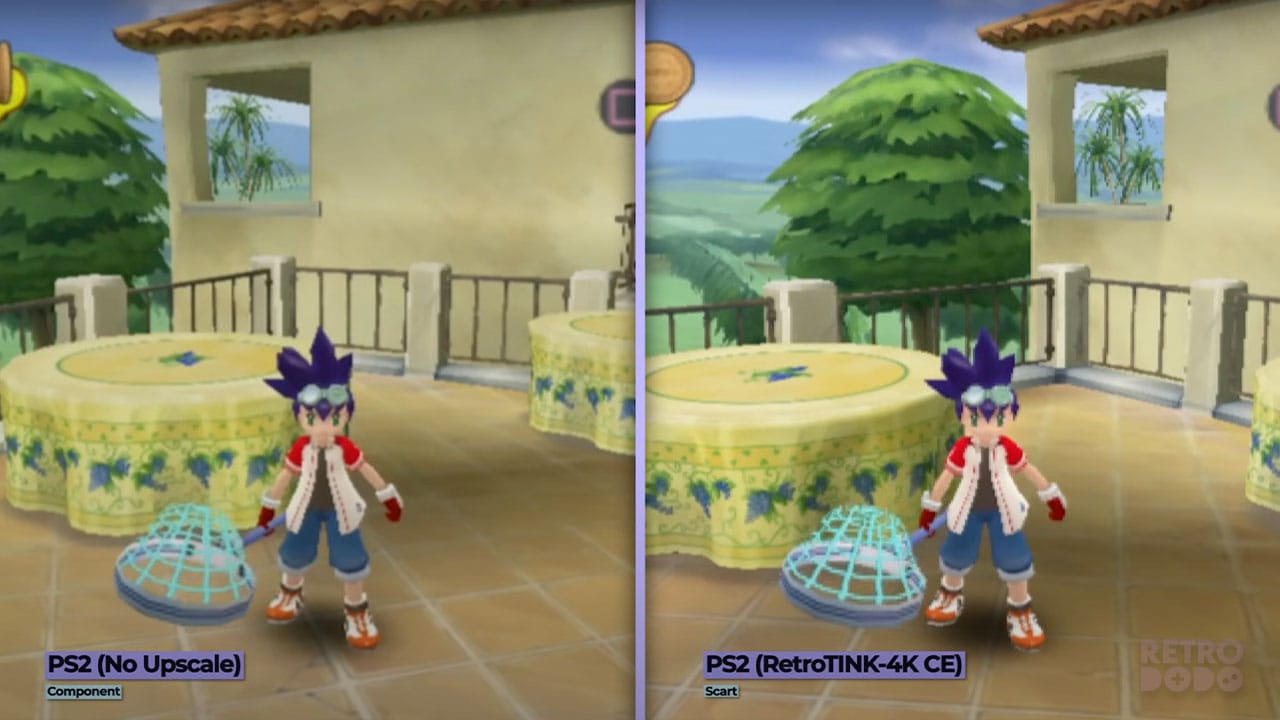
This is where my main criticism of the 4K CE rears its head. You see, despite the pretty enormous price of the device, it doesn't seem to offer a good smoothing filter option, which in my opinion makes a lot of PS2 era games look much nicer because it sort of irons out the pixelation to a certain extent.
This is hopefully something which will be added to the 4K CE at a later date because the same thing happened with the RetroTINK 5X device after its initial release, but this is a bizarre thing to not be included at launch on the 4K CE considering older and cheaper RetroTINK devices do have smoothing filters, it almost makes the 4K CE a slightly worse option in this specific area which is a baffling decision to me.
So, for PS2, I actually think that the RetroTINK-4K CE is a little disappointing, but you can add subtle CRT filters which mask the pixelated look a little bit, but it's not an ideal compromise in all honesty.
PS3
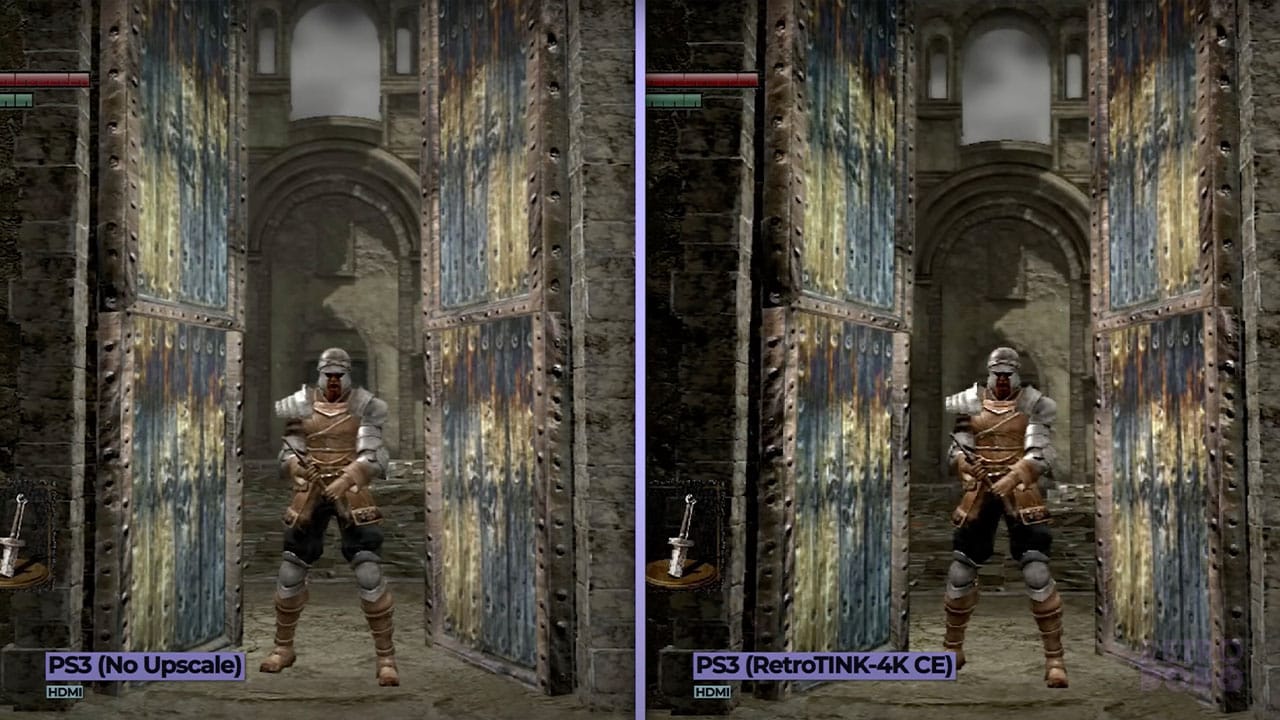
Finally, let's have a look at the PS3. I wasn't expecting much from this because it already outputs HD video, and yeah... I was right not to expect much because these two images look almost identical. If we really look closely, you could probably argue that there's slightly more depth to the dark areas on the RetroTINK image. Still, like with the Switch, I wouldn't be expecting the 4K CE to be improving the image from any HD consoles at all.
Is The RetroTINK-4K CE Worth Buying?
So, taking all of the quality improvements into consideration and the total cost of the device, is it worth adding the RetroTINK-4K CE to your setup?
It's a tough question to answer because it's so dependent on your exact situation and what consoles you actively use on a regular basis. If you only dabble in retro gaming on original hardware, then no, this is almost definitely not worth the £515.24 price tag.
If you do use a particular retro console a lot but only really one single system like the Dreamcast for example, then I would also say that this probably isn't worth it and you'd be better off getting a specific product for your console such as the Kaico HDMI Adapter, or for PS2 you could get the RAD2x cable.
For those of us who do frequently use a lot of different retro consoles, though, the RetroTINK-4K CE would be a much better investment. Just remember that on top of the device, shipping, and import taxes, you're also going to need the best video cables for each of your devices and a variety of video splitters and switch boxes so that you don't need to be constantly unplugging and reconfiguring wires.
The whole thing is a little bit of a nightmare and even when you do have all of the optimal equipment I still think that the 4K CE doesn't even make that much of a difference compared to much cheaper equipment with certain consoles like the PS2 and any older systems which use lower quality video output like the NES.
So what are the other options here? The RetroTINK-4K PRO has a lot of features which would help make consoles like the PS2 look a lot better, it has more advanced deinterlacing and a smoothing filter, but it's also a lot more expensive coming in at an enormous $750 without shipping or import taxes which when combined would bring the total up to £710.68 which converts to $943.85 and bare in mind the shipping could be even more expensive to take to the US.
That's basically £200 more than the 4K CE which to be fair, if you're already dropping over £500 on a device like this I would probably recommend you just save up a little bit longer and get the pro version instead just so that you've got the ultimate upscaler as opposed to one that's lacking in a couple of areas.
My real advice here though, would probably be to just go for the RetroTINK 5X. Sure, it doesn't scale up to 4K and only goes to 1080p, but you don't really need 4K support for these older games. It supports basically all of the same video inputs, including composite, S-video, component, and Scart, with the only things missing being HDMI and VGA, which are either quite niche or don't need to be upscaled anyway.
Final Thoughts
- Amazing compatibility with a ton of different video inputs
- Customisable CRT filters are great for masking lower-resolution consoles
- Cropping tool allows you to expand the image to perfectly fit the display
- Image is slightly improved on a few consoles
- No smoothing filter (yet)
- Very expensive
- Slightly unintuitive UI (you can't name custom profiles, and it doesn't auto detect active video inputs)
- Lacklustre visual improvements on PS2 and Wii
Having said all of that, the 4K CE is an excellent device. It just stings a little bit knowing there's a slightly better product above this that I probably should have waited to get instead, and there's a sort of comparable product that's cheaper than this that I could have got instead. It just feels like the CE is sitting in this awkward middle area where it's very good, but it always feels like you're missing out on something slightly.
When the 4K CE shines though, it really shines. With PS1 games, it's literally a night and day difference between the level of quality you can achieve with this device and without it. But with consoles like the Wii, it doesn't seem to be really doing all that much.
I don't know if maybe I was expecting a little bit too much here. Clearly, it wasn't going to make games look like they are being emulated, and the reason for that is that an emulator can upscale the internal resolution of the games rather than just the external resolution like we're doing here. But the lack of a good smoothing filter option really brings the device down. With this, the PS2, Wii, and maybe the GameCube comparisons would have been way more distinct and given the device much more value. So I can only hope that this is being worked on for a future firmware update.
I personally always prefer playing games on original hardware, even if it means having to spend a bit more. This is a pretty extreme amount of money to spend, however, and I would probably advise going for something a bit cheaper unless you're recording or streaming from retro consoles as part of your career. But hey, it's your money, spend it on whatever you want!
But that sums up my thoughts on the RetroTINK-4K-CE! Let me know if you're going to be picking up any of these RetroTINK upscalers, and if you already have one, let me know what consoles you think were improved the most!


